Alexa Device Control
Alexa EnabledUse Alexa to control devices via an ESP8266 or NodeMCU. After configuring the ESP8266 (NodeMCU), you can use this in conjunction with a relay to switch things OFF and ON.
Skills
- C
- Schematics
- IoT
Instructions
Below you can find a list of the parts, schematics and programming needed to allow you to recreate and produce this project.
Parts
Hardware Components
1
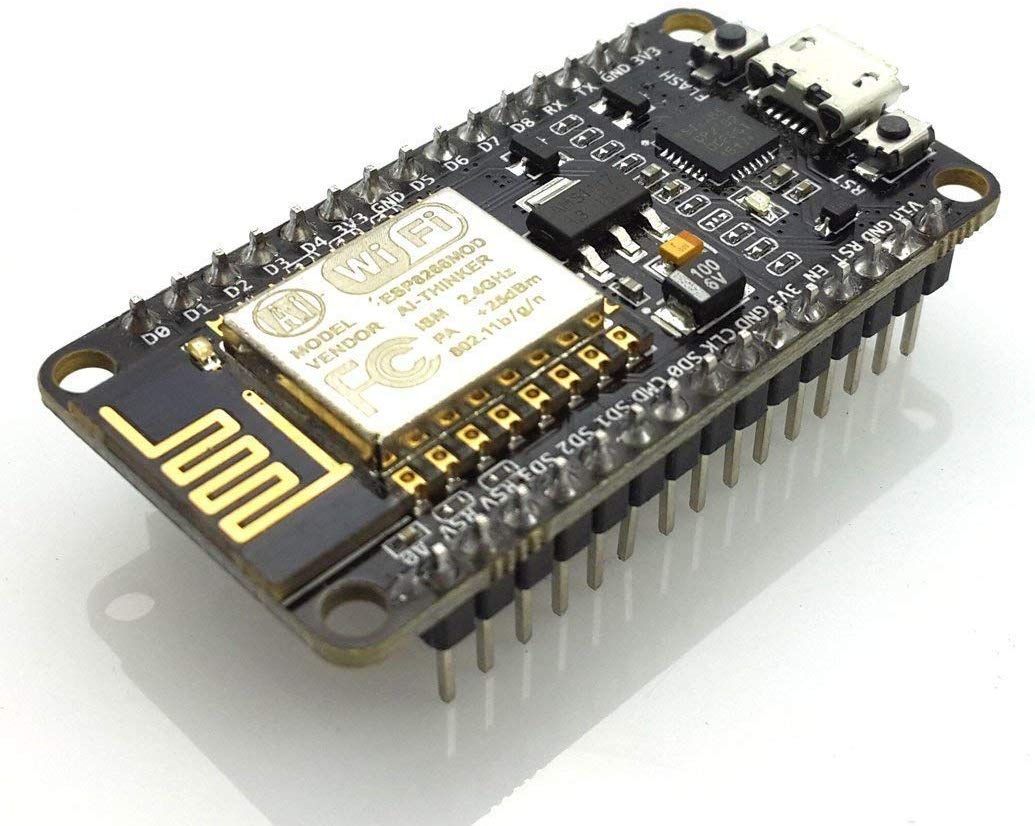
NodeMCU
This WiFi Module will receive signals from Alexa and turn them into signals to turn on and off a relay. The relay is used turn things on and off.
2
NPN Transistor
The transistor is used as a curernt amplifier in this circuit to help the nodeMCU low current turn on and off the relay.
3

Relay
The relay is switched on and off from the NodeMCU. The Normally Open contacts are used to turn on and off different objects like lights, TVs and other electronics that use switches.
4
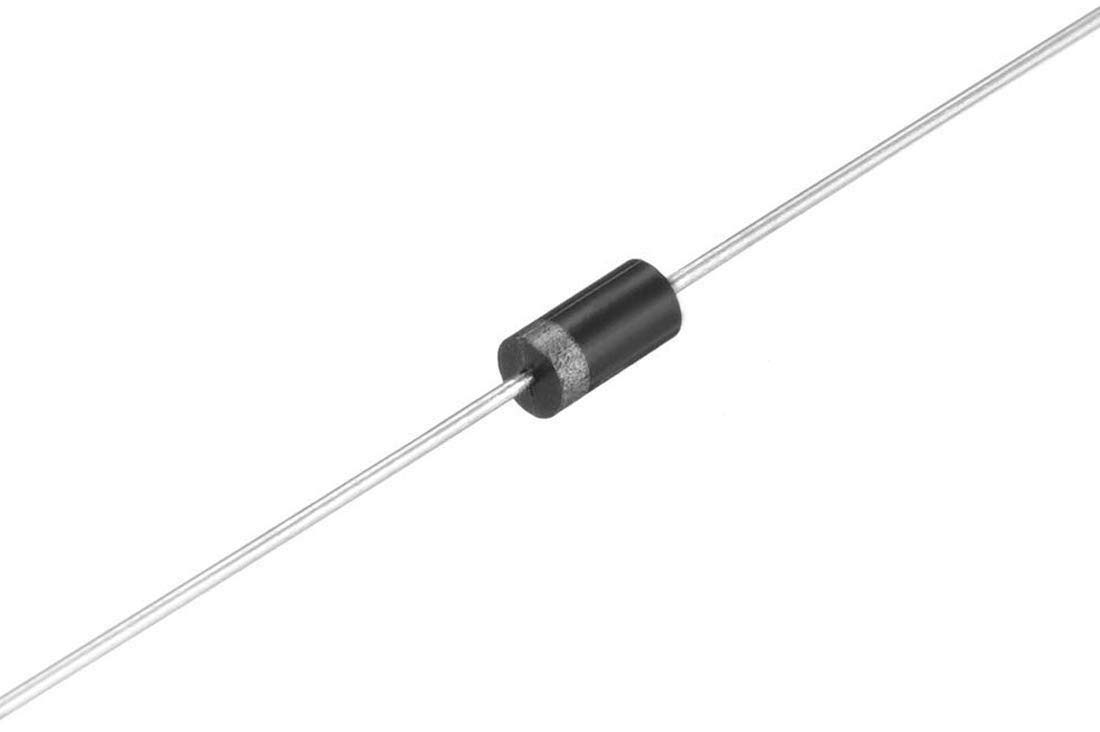
Diode
The diode is used a suppression or flyback diode. These are needed when switching on and off inductive loads like motors or a relay in this case. Otherwise can cause damage to NodeMCU or transistor.

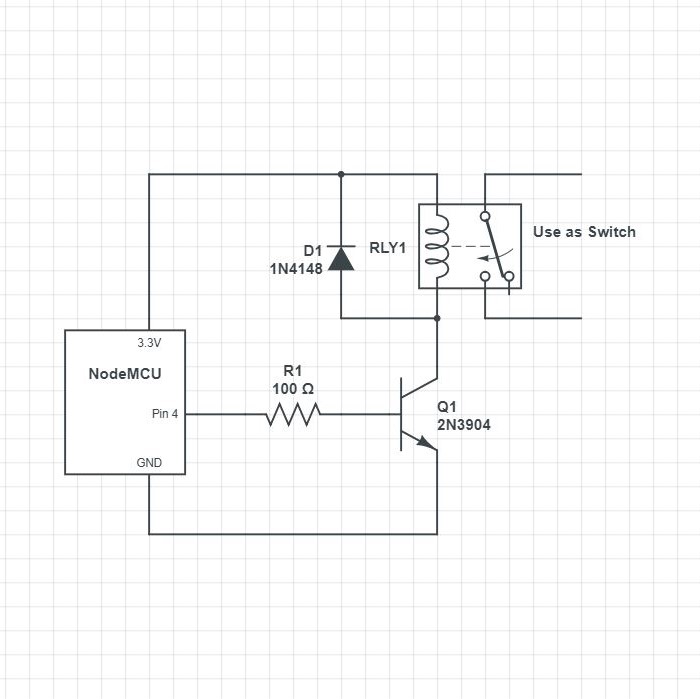
Schematics
Below I list exactly how to hookup your Alexa Device with the parts listed:
1. NodeMCU (ESP8266)
The NodeMCU is powered by MicroUSB 5V and is the main Microcontroller and Wifi Module for the Projects. This will receive Alexa commands and output a Pin.
2. NPN Transistor (2N222A)
This transistor will almost act as a Current Amplifier to allow the Output Pin to switch on the Relay circuit.
3. Relay Circuit
The Relay Circuit uses the Transistor to switch 3.3V through the coil to switch ON and OFF. The flyback diode is used to suppress the inductive current from the coil.
Connect NodeMCU to Arduino IDE
Download the following libraries: WebSocketsClient.h, ArduinoJson.h . Then open Arduino IDE and connect the NodeMCU with a Micro-USB cord.
Download Program (.ino) onto NodeMCU using Arduino IDE.
- Open Arduino.IDE and go to Board Manager > ESP8266 and get boards
- Open the sketch needed (NodeMCU-Alexa.ino)
- Upload to NodeMCU chip
Full Instructions
You can find the full Instructions on my GitHub Repository
3. Relay Circuit
The Relay Circuit uses the Transistor to switch 3.3V through the coil to switch ON and OFF. The flyback diode is used to suppress the inductive current from the coil.
Overview Instructions
- Download the NodeMCU-AlexaDevice Repository and Arduino IDE if you don't have it already
- Open Arduino IDE and download the following Libraries: ESP8266WiFi.h, WebSocketsClient.h, ArduinoJson.h
- Connect NodeMCU to computer via USB connection and Upload sketch(.ino file) to Arduino.
- Complete the Full Schematic NodeMCU, BJT, Resistor, Diode and Relay
- Connect Micro USB to NodeMCU for power and Enjoy